Optimizing the PlanPay Checkout Experience
In the previous section, Loading the Checkout, we discussed integrating a PlanPay checkout onto a website.
The features described on this page are only available after version 1.1.0+ of the @planpay/web NPM package.
The following topics are covered on this page.
- Optimizing the PlanPay Checkout Experience
Using these features correctly will optimize the user experience for your customers when using planpay on your website.
Transferring Customer Details to the PlanPay Checkout:
The planpay checkout widget can be integrated with the checkout of your website. When the customer has already filled out their details, these details can be transferred to the planpay checkout at any time, including before when the checkout is loaded. These details will then be used to prefill the corresponding form inputs on the planpay checkout, e.g. auto-filling the email address for login and sign-up.
The user details can be sent at any point in time before checkout, including before the checkout is requested.
Send Customer Details Using the @planpay/web Package
import { planpay } from '@planpay/web';

// Make sure emailAddress etc. are set.

// Provide some, or all, of the following details.
// All details will be patched.
// Use `null` to unset a property.
planpay.checkout.customer.set({
  emailAddress,
  phoneNumber,
  firstName,
  lastName,
});
Send Customer Details Using the planpay JavaScript SDK
<!-- Omit .sbx from the URL in production -->
<script src="https://sdk-app.sbx.planpay.com/planpay-sdk.js"></script>
<script>
  // Make sure emailAddress etc. are set.
  // Call this function to PATCH the customer details.
  // Provide some or all of the following details.
  // All details will be patched.
  // Use `null` to unset a property.
  window.PlanPaySDK.checkout.customer.set({
    emailAddress,
    phoneNumber,
    firstName,
    lastName,
  });
</script>
Controlling the Visibility of the PlanPay Pay Button
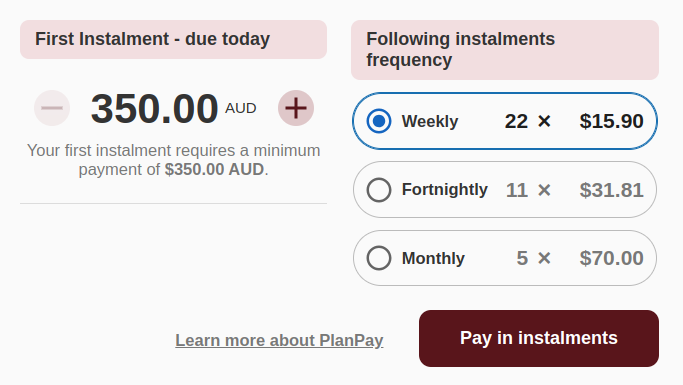
You have the flexibility to manage the visibility of the PlanPay pay button according to your website's needs. By default, the pay button is displayed upon loading the PlanPay checkout widget, as depicted below:

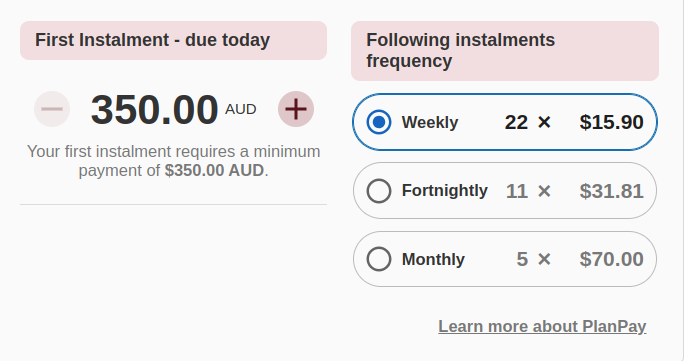
However, there are scenarios where you might prefer to hide this button. For instance, you may wish to utilize your own checkout's pay button instead. In such cases, you can hide the pay button on the PlanPay widget and activate your own checkout button, as outlined in Submitting the planpay checkout from the host page. With the pay button hidden, the PlanPay checkout widget will resemble the following:

You can control the visibility of the button during widget initialization using either the @planpay/web package or the PlanPay JavaScript SDK directly. When not specified, the checkout button is visible upon widget loading.
Control planpay Checkout Button Visibility Using the @planpay/web Package
To control the visibility of the checkout widget button using the @planpay/web package, follow these steps:
- Follow the instructions under Loading the Checkout.
- When loading or refreshing the checkout widget, set the
showPayButtonoption tofalse. Note that if theshowPayButtonproperty is omitted, it defaults totrue.
planpay.checkout.refresh({
  showPayButton: false,
});
Additionally, you can control the display of the button after the checkout widget has loaded using the following methods:
// Hide the button.
planpay.checkout.button.hide();
// Show the button.
planpay.checkout.button.show();
Control planpay Checkout Button Visibility Using the JavaScript SDK
To control the visibility of the checkout widget button using the planpay JavaScript SDK directly, follow these steps:
- Follow the instructions under Loading the Price-Preview Widget with Vanilla JavaScript and HTML markup.
- When loading or refreshing the checkout widget, set the
showPayButtonoption tofalse. Note that if theshowPayButtonproperty is omitted, it defaults totrue.
<!-- Omit .sbx from the URL in production -->
<script src="https://sdk-app.sbx.planpay.com/planpay-sdk.js"></script>
<script>
  // Call this function to load or reload the price-preview widget
  window.PlanPaySDK.pricePreview.refresh({
    showPayButton: false,
  });
</script>
Additionally, you can control the display of the button after the checkout widget has loaded using the following methods:
// Hide the button.
window.PlanPaySDK.checkout.button.hide();
// Show the button.
window.PlanPaySDK.checkout.button.show();
Confirm the planpay Checkout From the Host Page
When the PlanPay checkout button has been hidden, as explained in the previous section, the checkout process must be confirmed from the "host" page. This means that actions equivalent to pressing the hidden checkout button need to be performed in order to proceed to PlanPay. For instance, if you've hidden the PlanPay checkout button to utilize your page's "Confirm" button instead, your page's confirm button should implement one of the following methods to signal to the PlanPay checkout widget to proceed to planpay:
- Confirm planpay Checkout Using the
@planpay/webPackage - Confirm planpay Checkout Using the JavaScript SDK
Confirm planpay Checkout Using the @planpay/web Package
Call the following function at any time after the checkout is loaded.
planpay.checkout.confirm();
Confirm planpay Checkout Using the JavaScript SDK
Call the following function at any time after the checkout is loaded.
window.PlanPaySDK.checkout.confirm();