Payment Gateway Reconciliation
This page offers insights into how PlanPay seamlessly integrates metadata into different payment gateways and facilitates the location and creation of reports from these gateways, streamlining the invoice reconciliation process.
Using metadata from your payment gateway for invoice reconciliation
To make it easier for Merchants to reconcile the payments in their gateway reporting to the transactions on the PlanPay invoices, metadata has been introduced into the transactions.
Stripe
Metadata
The Stripe Metadata configuration is setup by the PlanPay team and there is no additional configuration required by the Merchant.
It includes a few different fields including the instalment number in the journey, the payment type, the planId and the trigger.
The most important being PlanID which will host the unique PlanPay Identification of each specific payment plan that has been created.
Metadata Reporting
The Merchant can then pull a payout reconciliation report via Reports > Payout Reconciliation.
When downloading the report the Merchant will need to make sure the Payment Metadata is ticked in the columns options.
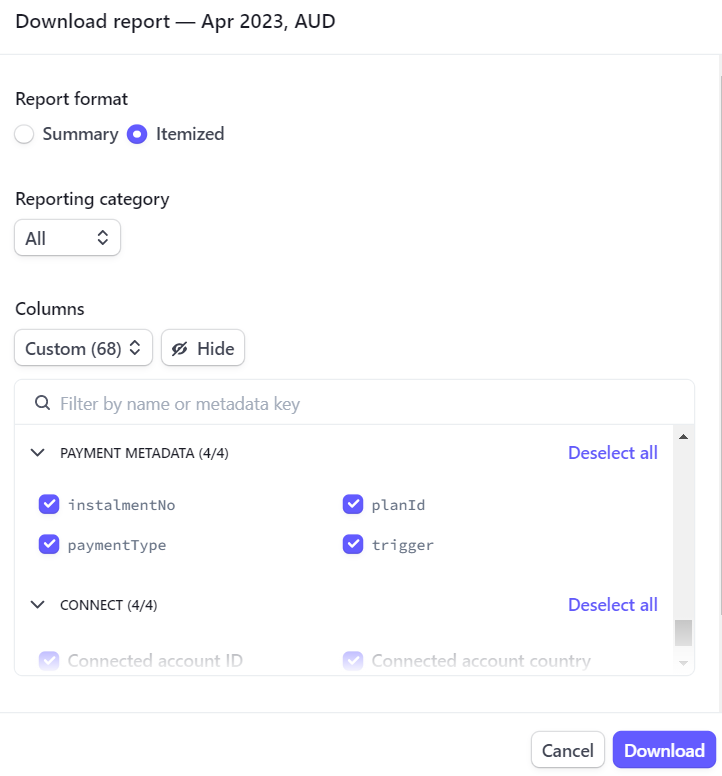
Then the Merchant can easily reconcile the two reports via this field.
Braintree
Metadata
For PlanPay to pass through metadata to Braintree when a transaction is processed there is also some additional configuration required by the Merchant within Braintree.
It is important to note that these fields must be configured to match exactly or the payments will fail.
The steps for configuration for the merchant are as follows:
-
Log into your Braintree account
-
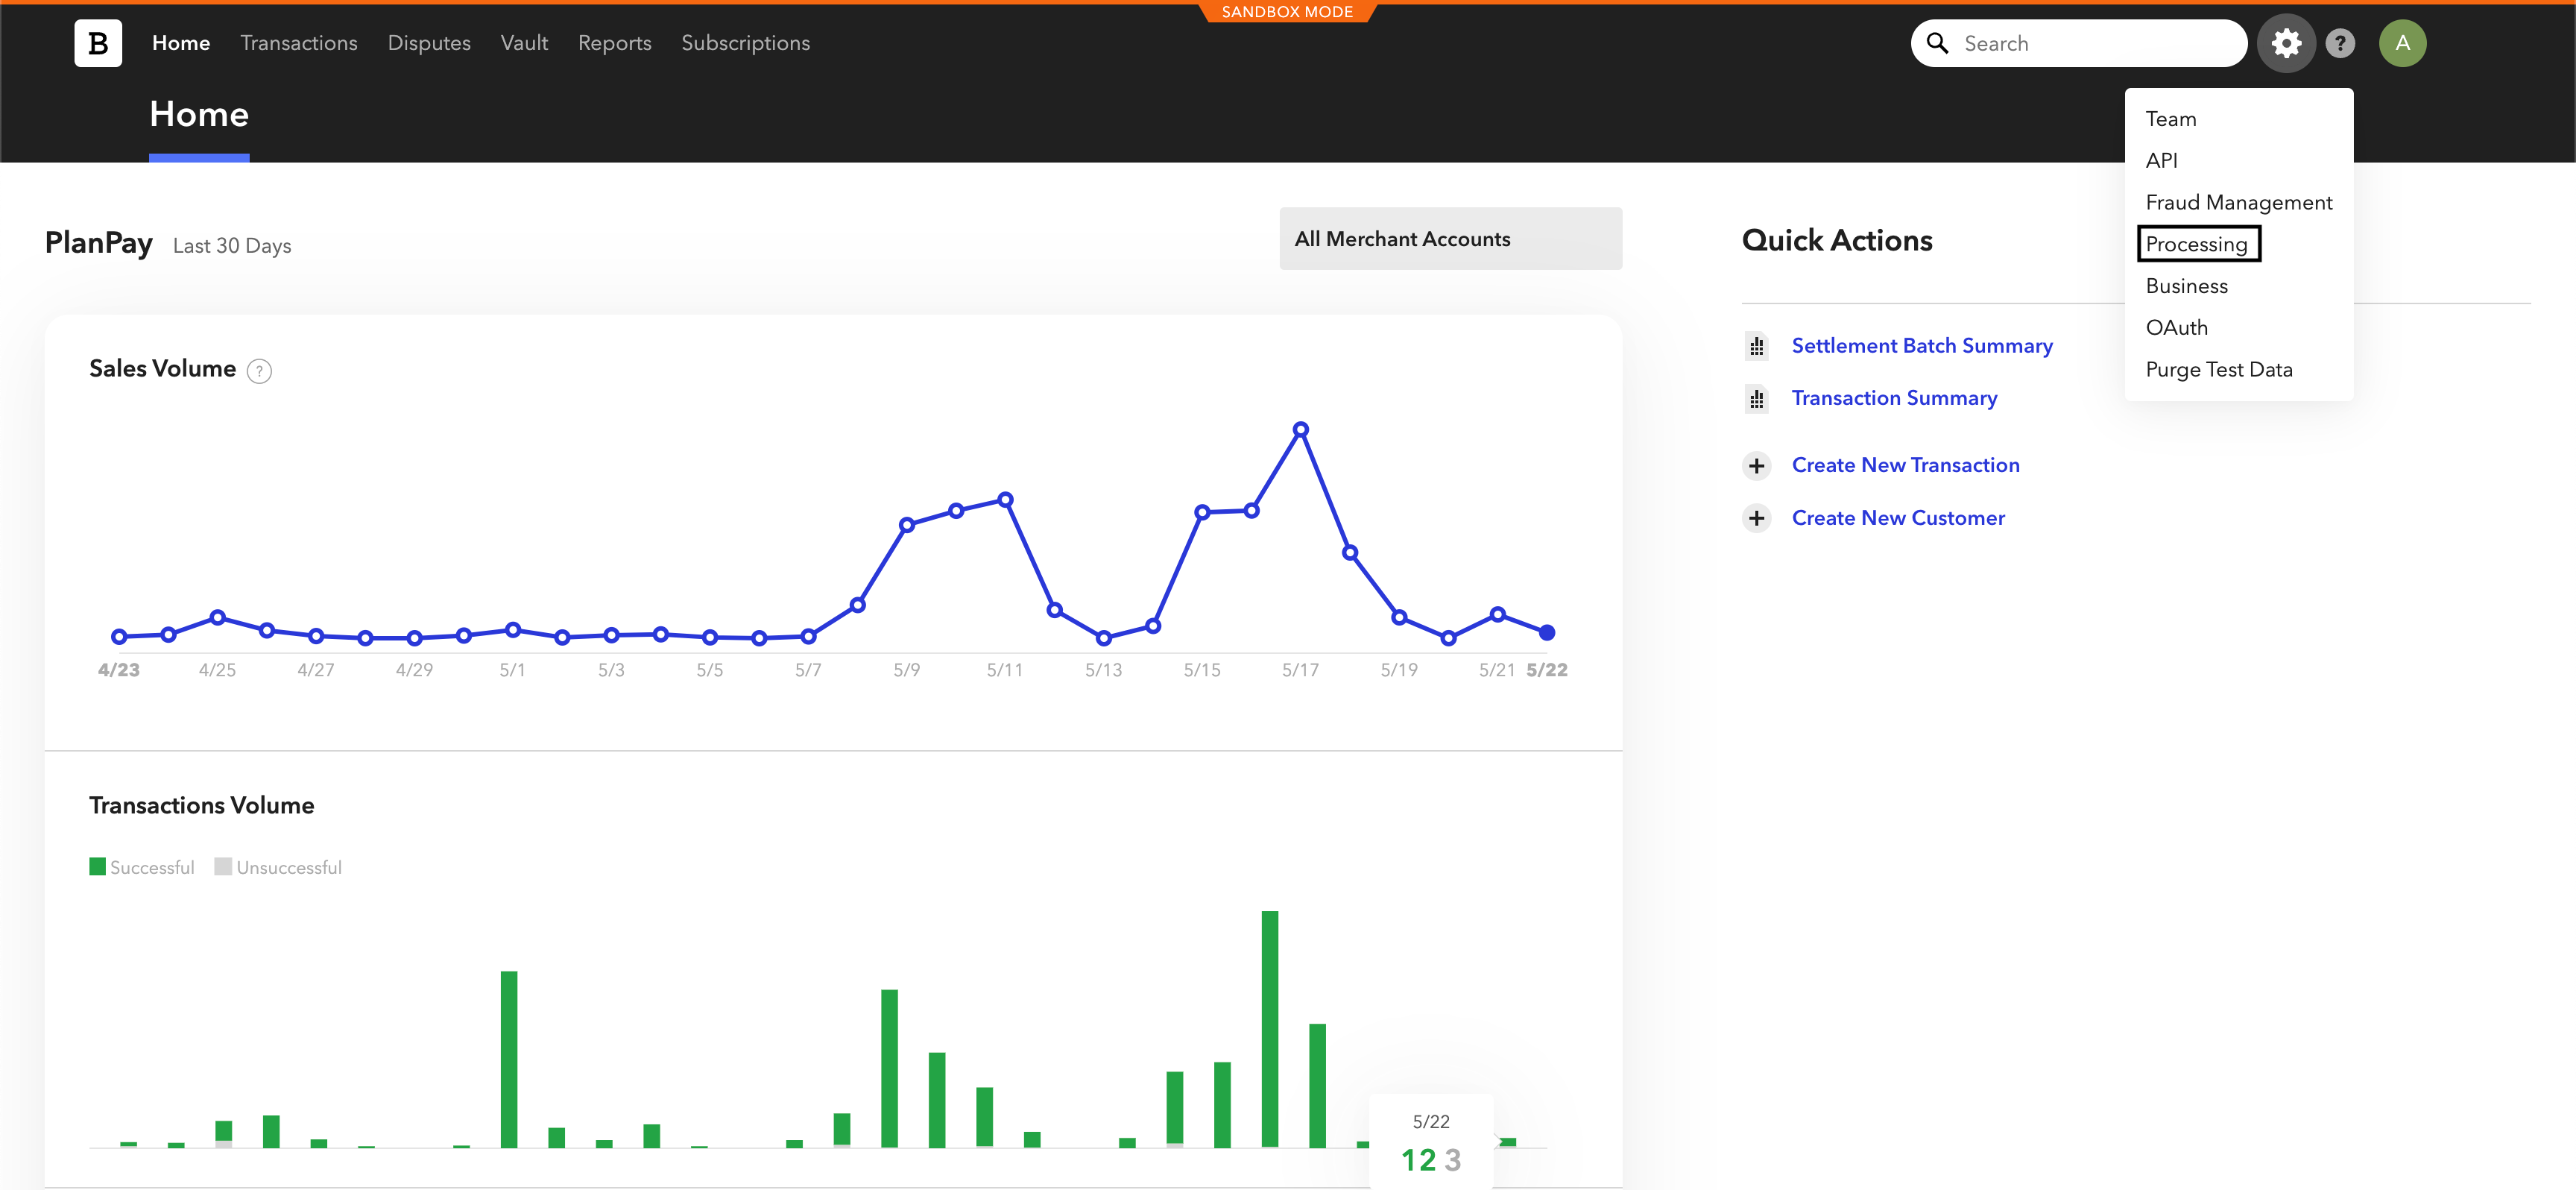
Click on the settings cog at the top right of the screen and click on the Processing tab as shown below:
-
Scroll down until you see the custom fields option. Click on the options button.

-
Click on the +Add button to add a new field

-
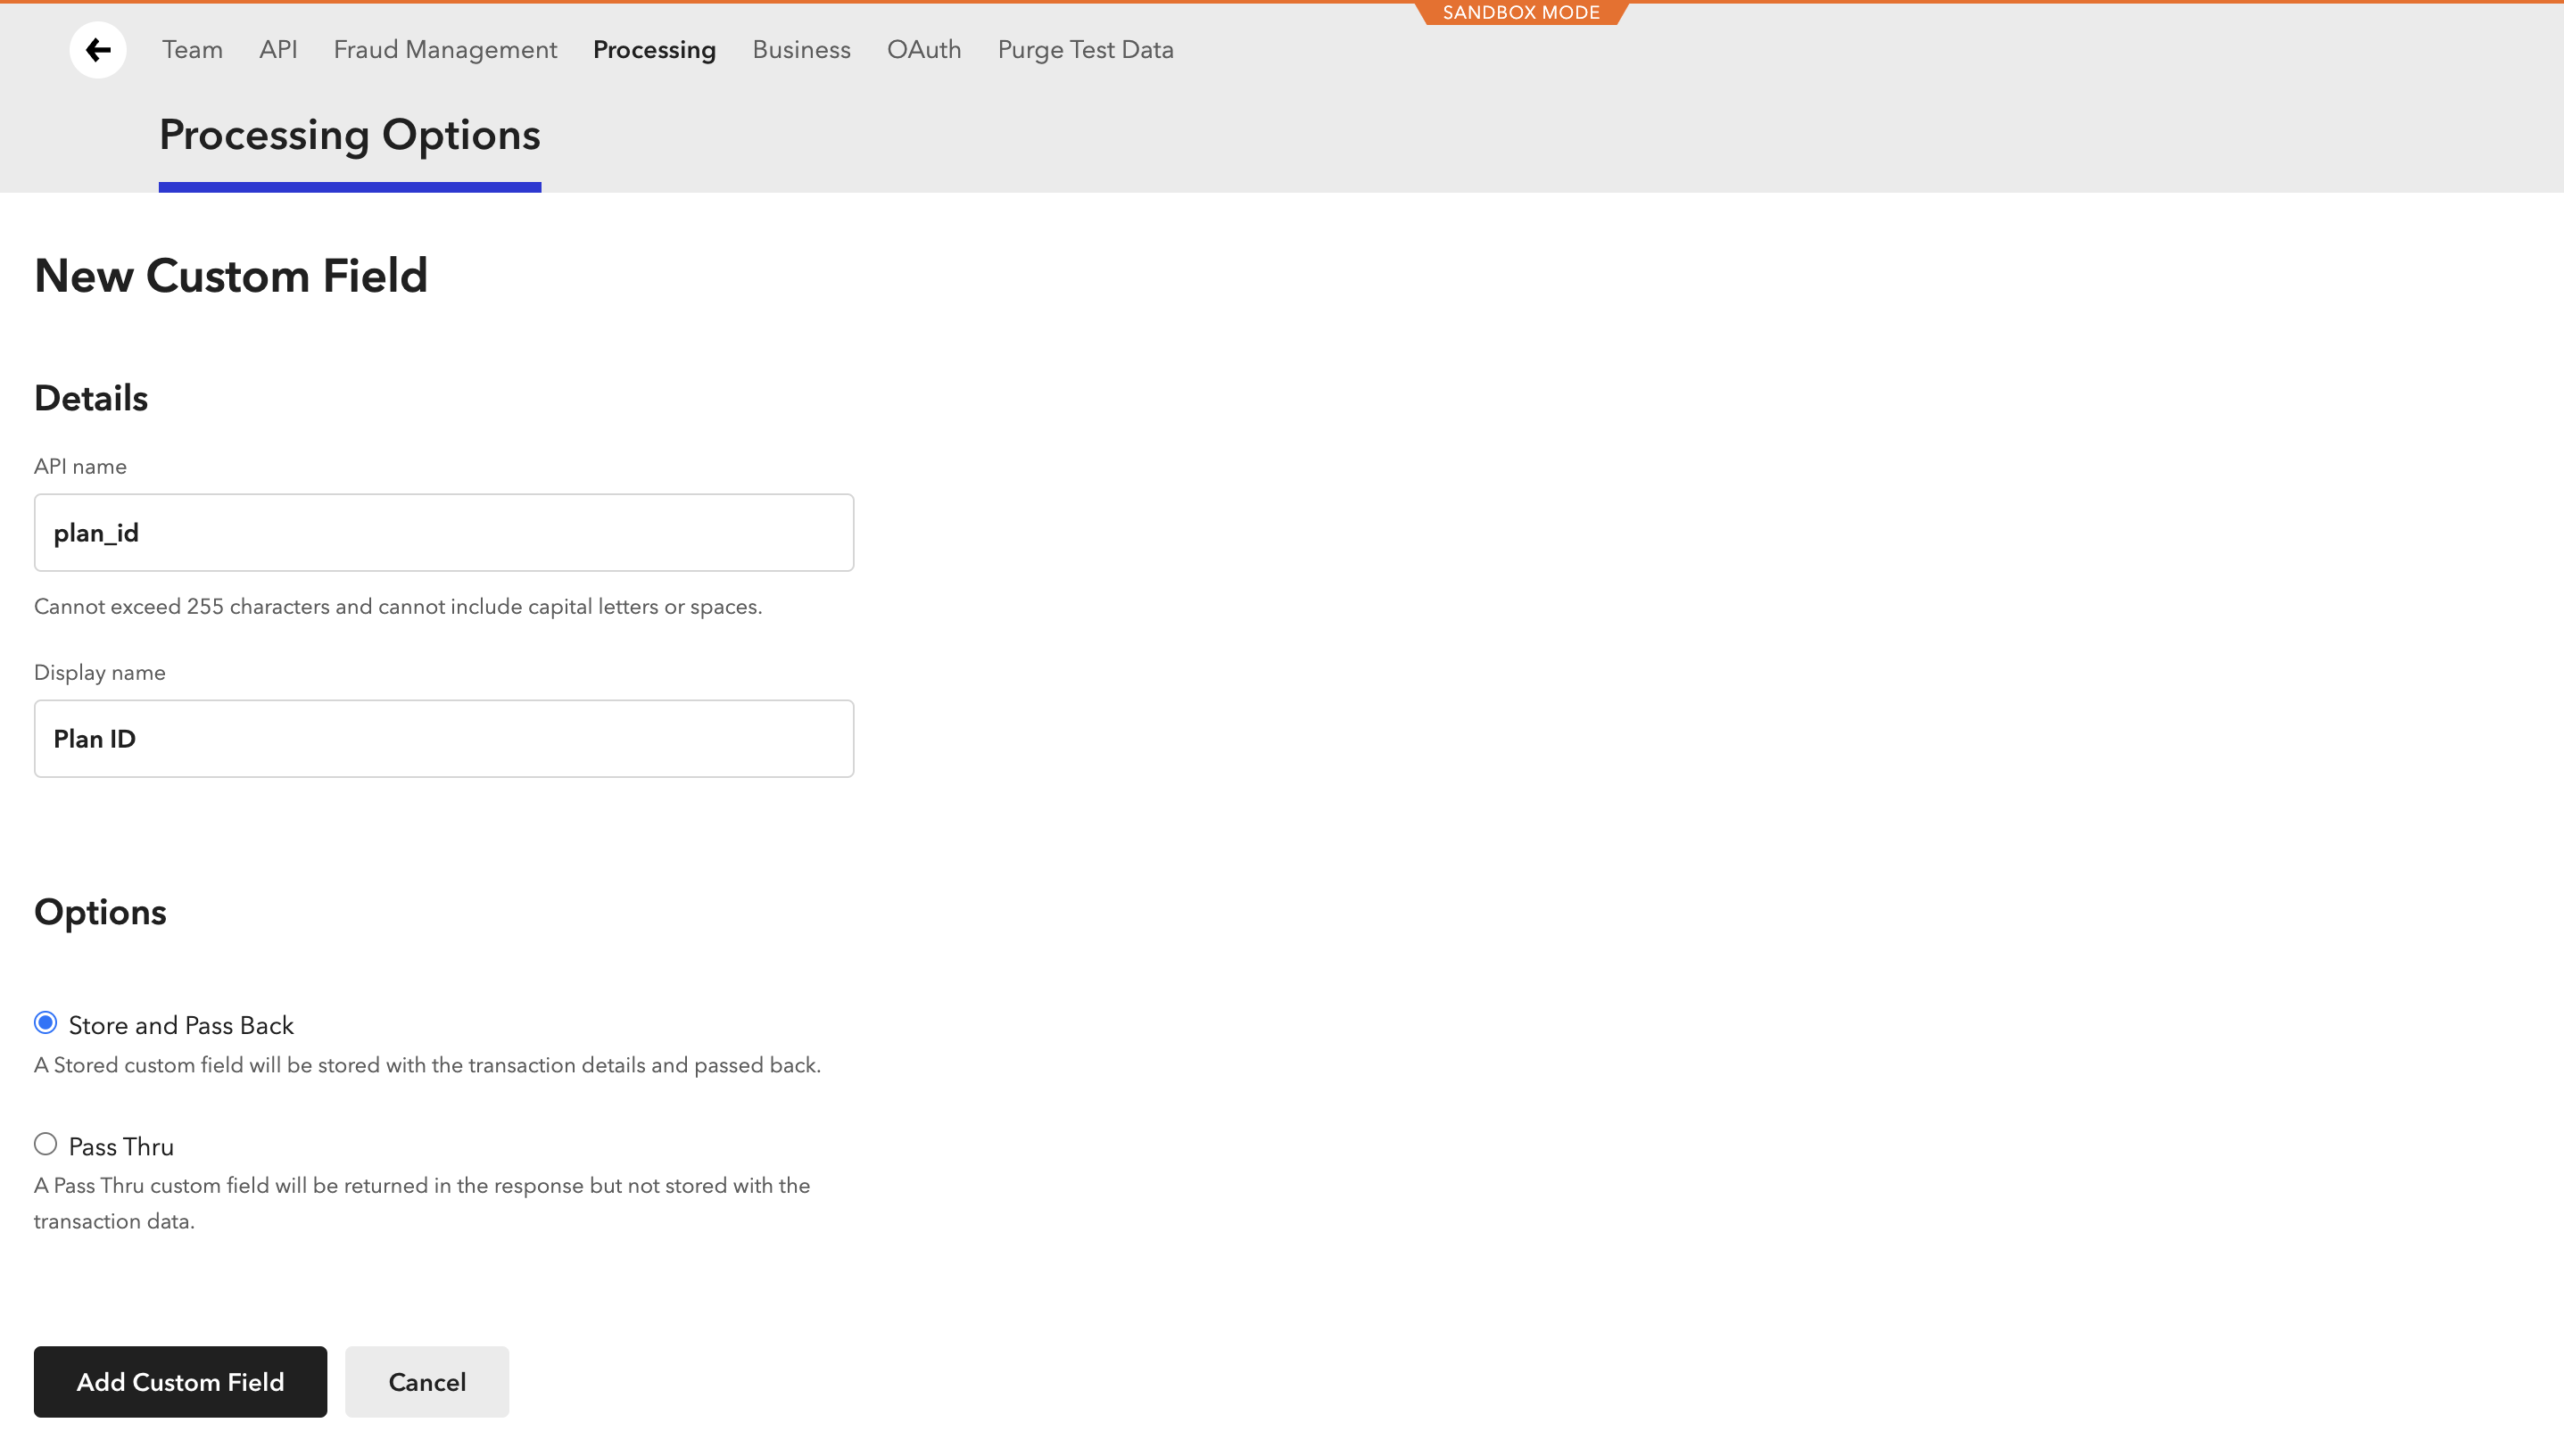
For the API name, ensure everything is lowercase and spaces are represented as underscores. For example plan id would be passed in as
plan_id. You may configure the display name to what you would like to be shown in your transaction reports.
Ensure that the Store and Pass Back option is selected. Click on the add custom field button to finalise.
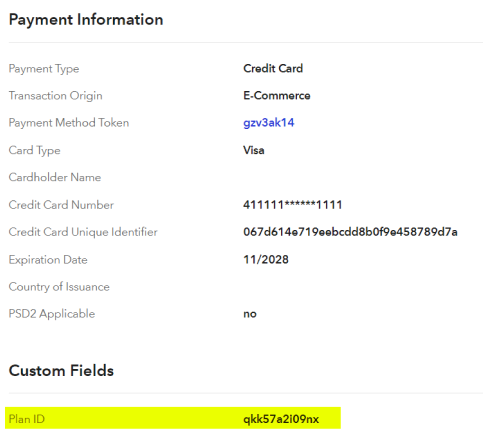
This data will then be stored within the transaction record in the custom fields section. In this case you can see Plan ID below:
Metadata Reporting
The Merchant can then reconcile the reporting via the Transactions screen.
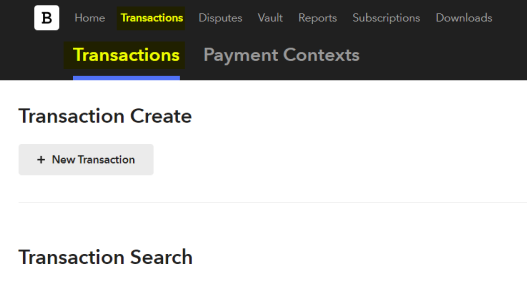
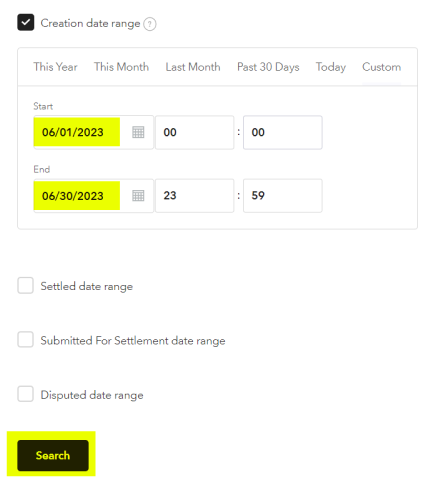
Then select the date and click Search:
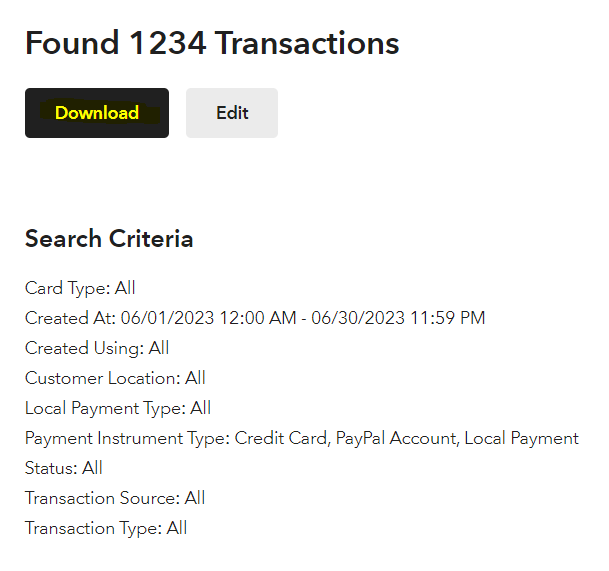
Click Download. When the transactions search is complete, you will be able to view the most recent download by date and export.
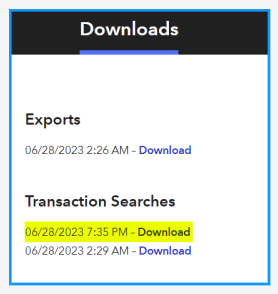
This export gives you 122 columns with different types of data related to the transaction. The best way to find the PlanPay transactions is to find Plan ID in the search and then filter to remove blanks.
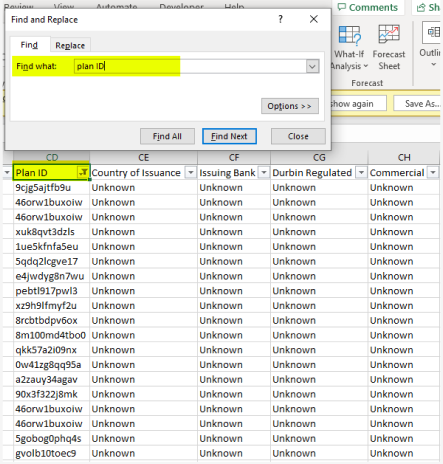
These transactions can then be reconciled against the PlanPay invoices.